Creating a delegation agreement
To create a delegation agreement, follow these steps:
1. Select section "Delegation agreements" in the top menu.
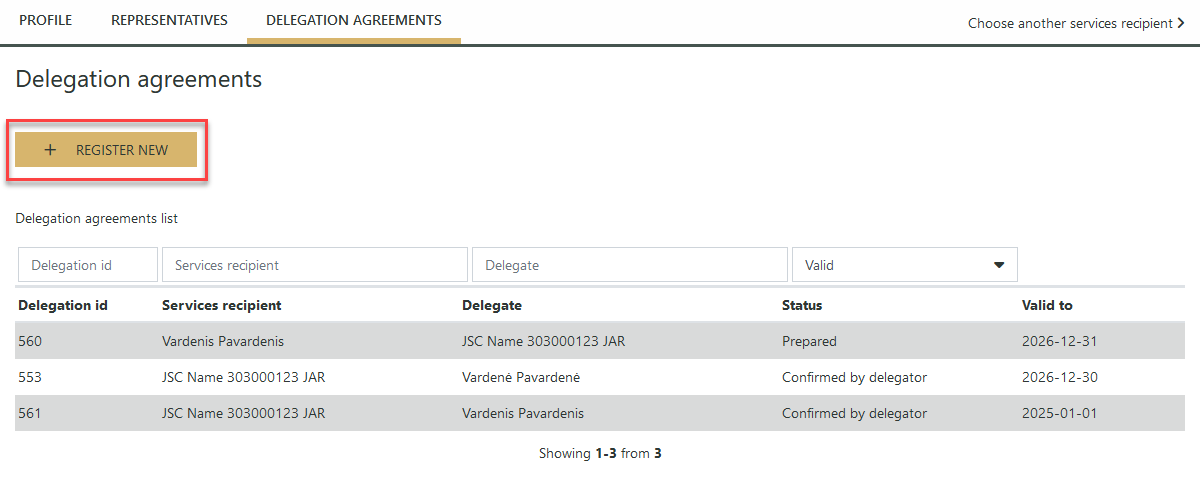
2. In the window that opens, click the "+ Register New" button:

Picture 1. Register new delegation agreement
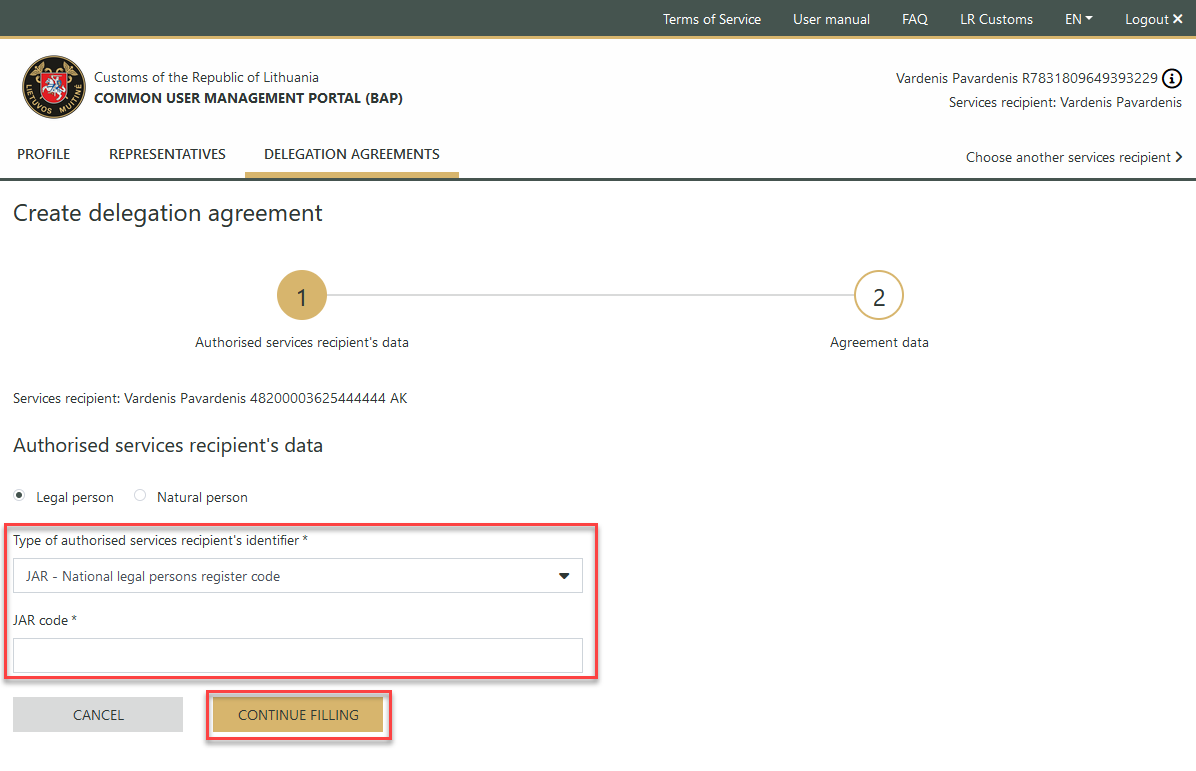
3. In the first step of the wizard, enter the details of the authorised service recipient (delegate) and click "Continue filling".
If you want to delegate the activity profiles to a legal entity, tick the box for the delegated service recipient to be a legal entity in the delegation agreement creation window. Select and enter the legal entity identification code to be used.

Picture 2. Details of the legal entity of the authorized recipient
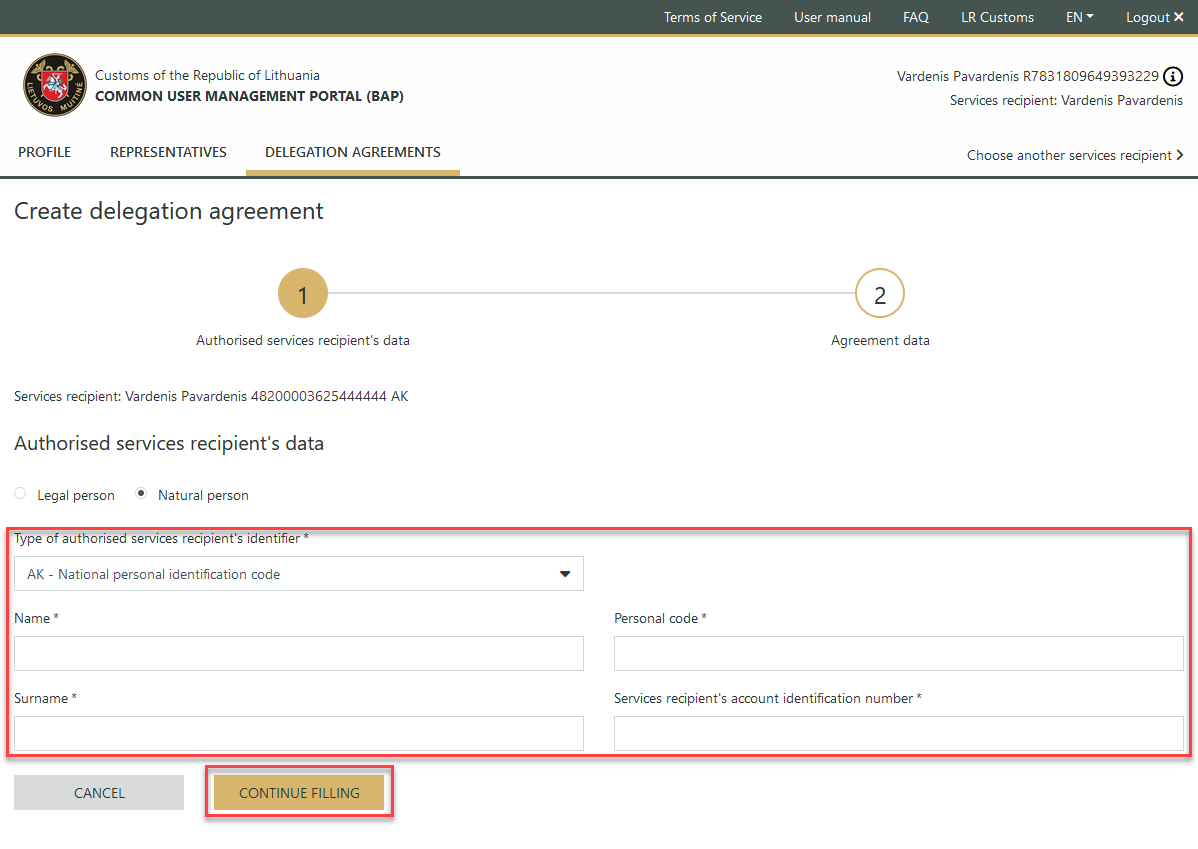
If you want to delegate the activity profiles to a natural person, in the in the delegation agreement creation window, tick that the authorized service recipient will be a natural person.

Picture 3. First wizard step - Authorized services recipient's data
Select an available identification code and provide the person's name, selected code and the registration identification number of the authorised service user's account.
You can find the account number of the authorised recipient number by logging into your account and selecting the "Profile" tab, as shown in the image below:

Picture 4. Services recipient's account identification number
Note
You can only conclude a delegation agreement with a natural or legal person who is already registered in the Customs Information System. How to register a natural or legal person is described in the section "User registration and data modification".
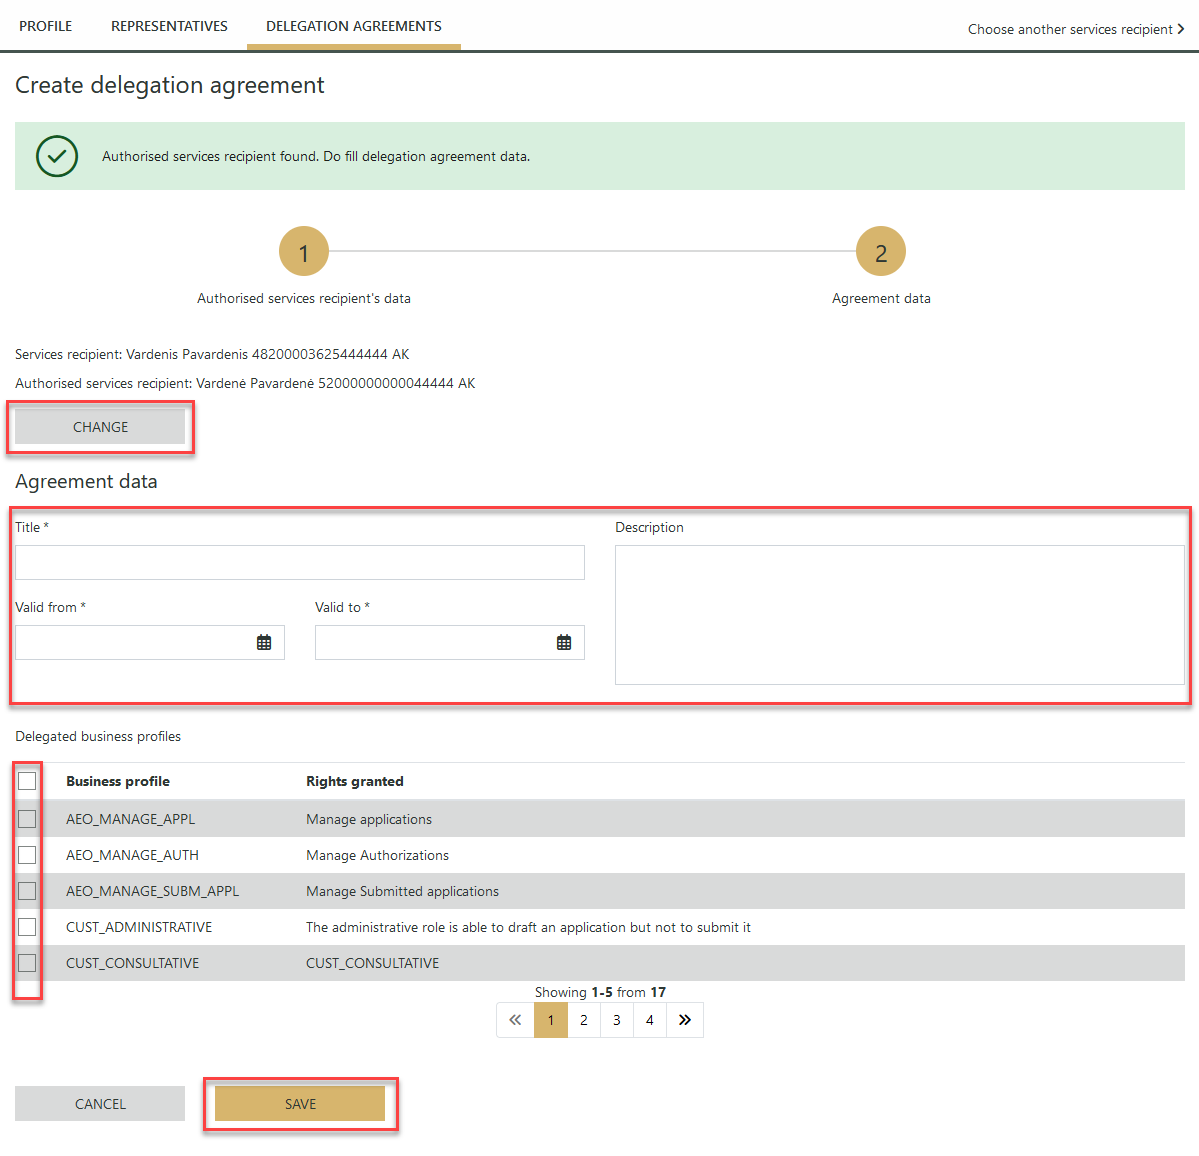
4. The second step of the wizard will contain the details of the authorised recipient of the service. If you want to modify the data of the authorised service recipient, click on the "Change" button and you will be returned to the first step of the wizard, if the data of the authorised service recipient is correct, enter the data of the delegation agreement, specify the business profiles of the activities you want to delegate, and then click on the "Save".

Picture 5. Second wizard step - Agreement data
Once the agreement is saved, it will be redirected to the authorized recipient. The representative of the authorized recipient with administrator rights will see the contract by logging into the Authorized services recipient's account which will be able to approve or reject upon review as described in "Approval and rejection of the delegation agreement".